
 Tired of that same old diaper changing routine? Want to add a little flare to your diaper bag? Here is a quick way to spruce up your travel wipe case. In about twenty minutes, you can have a funky new case to put your disposable wipes in. They are so easy and cheap to make, that you may end up making more cases than you need. I personally have them coming out of my ears. Almost one for every outfit. Excessive, I know, but I love to make them. Plus, they make great gifts for mother's-to-be and mother's with small children. I love to give them away as shower gifts. They are always a hit. Check out the diaper clutch tutorial, so you can make a matching clutch to put your case and diapers in. Have fun with this one and express yourself!
A little tip for you. You can buy a small diaper wipe case for $1.00 at both Target and Walmart. You can find them in the section with the travel sized shampoos and soaps. It's a great deal! I usually buy a couple at a time. Then you can just buy giant packs of disposable wipes from Costco or Price Club and refill your case as needed.

Materials
-1 Empty Diaper wipe case
-2 pieces of Printed fabric from your scrap pile (each measuring 5"x9")
-2 pieces of felt
-1 1/3 yards matching trim or ribbon
-hot glue gun
-scissors
 You will begin by preparing your felt to be attached to your wipe case. Now is a good time to plug in your hot glue gun, because you'll be using it soon. That way it will be warm when you're ready to use it. Now, fold one piece of felt in half and place wipe case on top of felt to see the exact size you'll need.
  Trim off the extra felt from the open edges of the felt. Then trim the top edges off as well. Your felt piece should be close to your case in size. It doesn't have to be perfect or pretty, because you will trim the edges once it is attached to the case. I like to have my felt doubled up, because it absorbs the hot glue and doesn't leave any residue on your fabric.
  Repeat the previous steps with your second piece of felt. When you're finished, you should have two pieces of felt to attach to your case.
 Time to begin assembling your case. Open one piece of felt and apply glue to one half of the inside. Press felt piece together again and smooth out the glue. It should only take a second to begin to harden. Do the same to your second piece of felt.
Your next step is to glue your felt pieces to your case. One piece will be applied to the top of the case and the other one to the bottom. I like to do mine in small sections, so the glue doesn't harden before I can apply to felt. Place the folded edge along the backside of the case where the hinge is.

Now that your case is padded with felt on the top and bottom, you'll want to trim any excess felt from your corners and edges. Again, it doesn't have to be perfect, because it's about to get covered up. But you don't want to have excess felt hanging over the edges.
 Next it is time to attach your fabric to your case. Before you begin to glue, decide how you want your fabric to lay on your case, especially if there is a print. Lay your fabric on top of the case and adjust it to the position you like the most.
  When you are ready to glue, I recommend starting on the back of your case along the hinge. Apply a line of glue along the lip of the case just above the hinge. Leave about a 1/2 " from each corner unglued for now. Place fabric edge over the glue and line it up with the hinge. Again, it doesn't have to be perfect, because your edges will get covered up in a moment. And be careful not to glue over the opening of the case. You don't want to glue it shut. It should look like this so far.....
Next, flip your case to the opposite side, where it opens. Apply more glue to the front lip of the case like you just did at the back. Pull your fabric tight towards the front and then press it onto the glue. You don't want any wrinkles.
 Next you will need to trim off the extra fabric at your ends before gluing down the sides of your fabric. Apply glue to the lip on the side of case, leaving a 1/2 " on either end open. Once you have gled down the sides, trim the extra fabric that hangs down on each of the corners. Then glue them down. Your case should look like this once you're done. See how my edges aren't perfect. We'll fix that in a minute, I promise.
  Now repeat those same steps, and attach your other piece of fabric to the bottom of your case. It should look like this once you have finished:
 All sides should be attached and ready for your trim.
Now you are ready to attach your trim. I like to start in the center of the back of your case. Start with one small glob of glue. Place the end of your trim to the glue and press it down. Not too hard, because you don't want to smear your glue everywhere.

Apply small amounts of glue (about 2" at a time) and attach your trim all the way around the top edge of your case. Once you reach where you began, cut your trim and place another glob of glue and press the end in line with your edge. It should look like this when you're finished...
 Repeat the same steps, and attach your trim to the bottom lip of your case.
 This is what it will look like when you are finished. Great, right?
  That's right, you're already finished! I told you this was an easy project. Now fill your case with some disposable wipes and add your new travel case to your diaper bag.
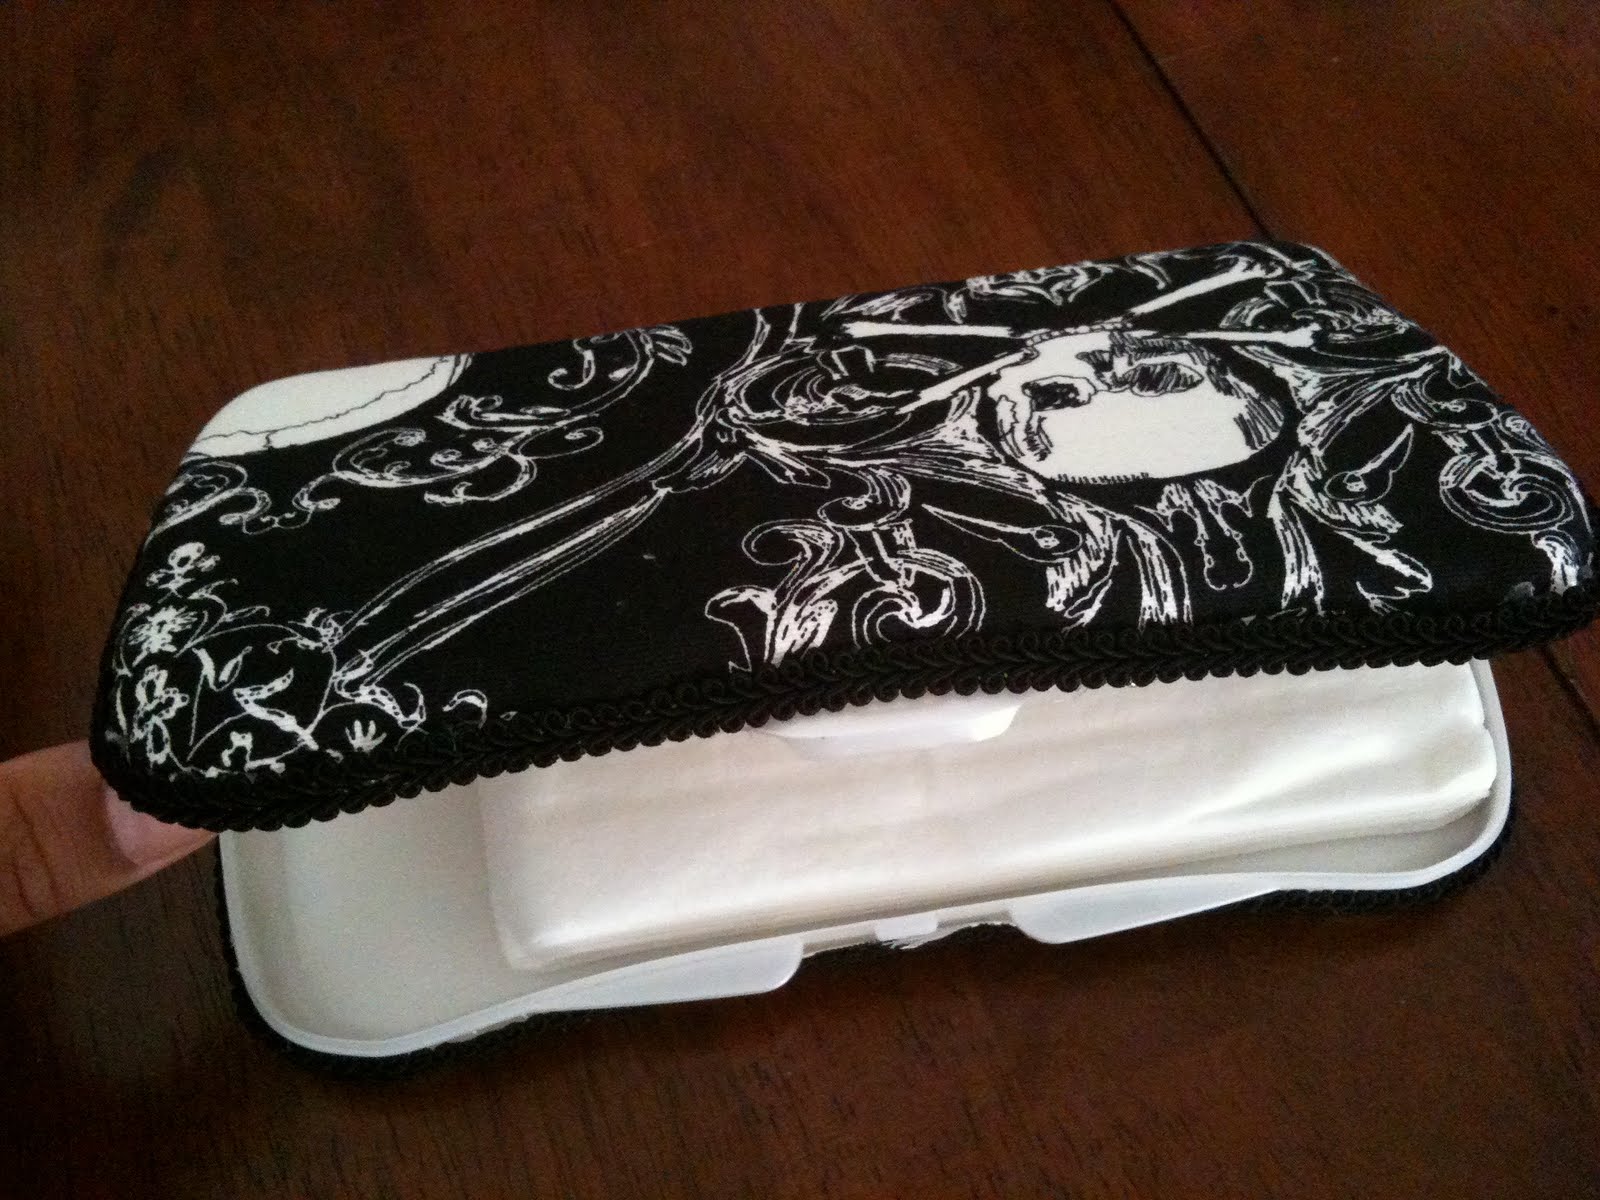
BTW....Here are some other versions of cases that can be made......


 Enjoy!
No comments:
Post a Comment