Happy Monday everyone! I am really excited about this week. It is my first book review. I have already gotten started on some of the projects in this book. I can't wait to get started. So let's begin...
Day One of the Simple Sewing for Baby Book Review
Our first project is from Jansdotter’s chapter entitled Playtime. Today we are going to start with a fun and easy project. The Tag Blankie. I think you’re going to like this one. It’s a craft you can complete during baby’s nap time. That’s right, you cane have a new toy for your little bundle of joy when he or she wakes up!
The tag blanket is a wonderful asset for all mothers with infants. They can keep babies occupied and entertained for prolonged periods of time. Babies just marvel at the colors and textures. They love to pull on and suck on the ribbons. You can create some great blankies using a variety of prints, textures, and colors. They make great gifts for mothers-so-be. And it’s another project that will enable you to deplete your fabric scrap stash. You’ve got to love that!
Materials Needed:
½ yard lightweight cotton fabric
20 pieces of ribbon with various colors, widths, & textures
(cut in lengths ranging 4”-8” long)
We’re going to begin by cutting our fabric and ribbons. Take your fabric, measure and cut two (2) pieces of fabric 13” x 13.”
Next cut your ribbon pieces. You will need twenty (20) pieces total. Cut them different lengths. I like to cut mine into 4”, 5”, & 6” pieces. I also like to use different color ribbons as well, to change things up.
Begin with one piece of your fabric right side up. Fold each of your ribbon pieces in half and pin them to the fabric, with the raw edges matching up with the raw edges of the fabric. Pin your ribbon pieces spanning the entire outer edge of the fabric. It should look like this once you’ve finished.
Once you’ve pinned all your ribbons in place, lay your other piece of fabric on top of the ribbons, right sides together. Pin your two pieces of fabric together.
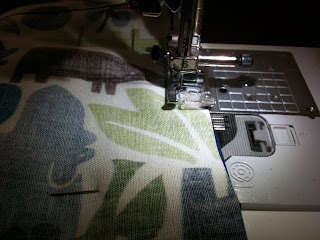
Machine stitch around the outer edge of the square, leaving an opening about 3” wide. Make sure you backstitch at both the beginning and the end.
Remove all your pins. Then clip the corners at a 45 degree angle.
Next turn your blankie right side out. Use the point turner to poke out the corners. Fold under the ½” seam allowance on the top and bottom of the opening and press it with an iron.
Machine stitch a ¼” seam all the way around the outer edge of your blankie. Backstitch at the beginning and the end.
That’s right! You’ve finished your tag blankie. I told you this was a quick and easy project!!! That’s why they call it simple sewing for baby.
Here are some variations I have completed. Check them out. Get creative. It doesn’t have to be that same old boring blankie. That’s the beauty of making things yourself!
Tomorrow we’ll be making Velcro pouches. Stay tuned……
Enjoy!


No comments:
Post a Comment